
When I was first handed this new-to-me vintage cookbook, I immediately took notice of the squishiness of the cover. Whatever thick cardboard-like material they used has a certain puffiness to it, trapping air between the layers in a way that allows you to squeeze it a bit.

The timeless elegance of four (4) lit candlesticks combined with the future of heating plants and animal flesh
Kelp, What The Heck Does That Have To Do With Anything
Oh nothing. Need to start this bad boy off somehow! This microwave-focused cookbook looks to have been originally published in 1982, a Time to have a Microwave Oven.

Next time I get asked why I’m still single, I’ll say that I, like Better Homes and Gardens, have a high standard of taste appeal
So understandably, it serves as a sort of manual and general informational resource about microwaves and how they work, on top of a collection of recipes. For example, it helpfully explains in detail how the thickness of what you’re cooking can affect how fast it cooks.

“Check the things you can do yourself” is quite the line
Now, I remember my parents back in the day telling me about the wonder of the microwave oven, and it was singular. It was the fact it could bake a potato quickly. Obviously, once microwave dinners became more common, it was the appliance for that too.
I have questions
But nowadays, I don’t use the microwave for all that much. Most frozen foods do better in our countertop oven, and my dad is a fan of using the air fryer for things like chicky nugs.

But how will I cook without non-stick vegetable coatings?
Even a baked potato is simply…baked, in our household. Sure, it takes like an hour, even with the cutting-edge technology of the Potato Nail™. But so does the rice cooker to cook rice, and it’s very much a Set-It-And-Forget-It task.
But if mom’s working late, who’s cooking?
Really, when I think of the tried-and-true function of the microwave in my meal-making, it’s to quickly steam frozen veggies. Or fresh ones. It’s very good at that!

Remember: don’t trust your microwave or random sellers at farmers markets when it comes to canning
Who Is This For
Maybe this is why I had a hard time getting excited about making any of the recipes in the book. It’s not that they were too unusual, or unappetizing, or bland…

What every kid looks forward to at dinnertime: Salmon Loaf

Okay there’s a lot of recipes in here, they can’t all be winners
It was that I didn’t see the point of making them in the microwave. When I think of microwave meals, I think of stuff on the same level as dump cakes.

You know, something this lady would promote on a 3am infomercial.
This isn’t to make fun of the concept of things like ‘mug cakes’ or what not. To me, the microwave is an appliance of convenience, and so I expect recipes explicitly engineered for it to, by extension, also be convenient. And sure, some of the recipes in here are. But others, it’s like, why don’t I just cook this in a saucepan on the stove? Or perhaps even, the Oven Oven?

This recipe in line with my microwave musings was called something like Ham and Cheese Roll-ups
Ah, my imaginary reader interjects, because the microwave is faster! Well. Is it, though.
Even if we zero out all the prep work and just compare Cooking Times, we run into a problem. Many of these things have to be cooked separately or in stages, reducing the amount of time saved. Others need to be carefully cooked, requiring stirring halfway through or checking for doneness, something that’s much better handled on a stovetop. And many of these recipes just really wouldn’t take that long to cook period.
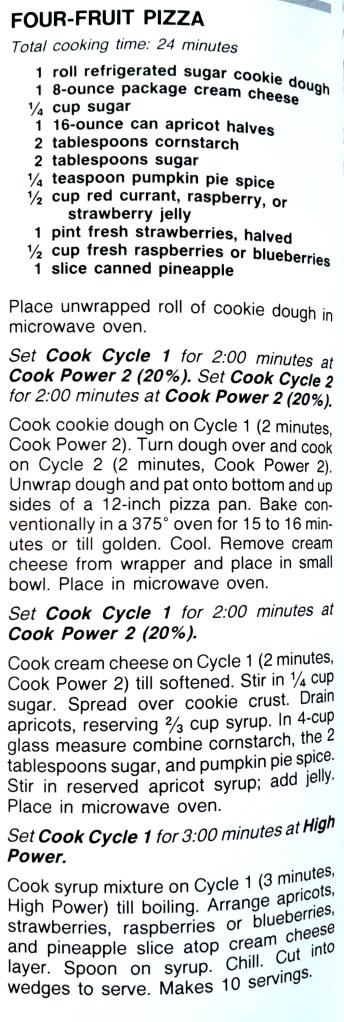
This dessert pizza just straight up has you “bake conventionally”!
For things that would take a long time to cook, say like, a pot roast, we end up back in Set-It-And-Forget-It land. First off, good luck fitting a good size piece of meat in your microwave, let alone getting it to cook evenly. And again, even at the time, there was already not one, but two appliances for the job – the slow cooker and the pressure cooker, the latter which also cooks stuff pretty quick. If I compare my mom’s oft-used InstaPot recipe for a roast to those in here, it’s more or less the same amount of work for what must be a better pay-off.

Busy housewives! Save an hour that you would have just spent cleaning or watching a soap opera or whatever.
So This Is A Useless Cookbook Then?
Well, no. I think this is what the kids call theory-crafting. As someone who belongs to both the American and Japanese cooking spheres, something that gets brought up a lot is “why do Japanese people microwave everything”. And there’s a couple things going on here, but we’ll cover the two non-obvious ones first.

When my small-brained self first glanced at this, I thought the water was just used for steaming something…


Okay, but why specifically coffee ice cream?
First one, is they’re not necessarily microwaving things in the microwave. I know, I know. Basically, there’s appliances called 電子レンジ “electric range” that can microwave things, but there’s also appliances called オーブンレンジ “oven range” that can switch between microwaves and …heat waves. (Kelp, do you mean convection- no! That’s a separate other thing that breaks easily!) Even if you are familiar with these dual function ones, it can be confusing – I remember a De De Mouse livestream where he was making…pizza toast? I think. Something you really need to cook at high heat for it to come out properly. You know, the Broil setting’s involved. And some commenters in the chat were slightly horrified that he kept on putting it back in the “microwave” for an inordinately long time after judging it wasn’t quite done yet. Bonus, it was covered in aluminum foil! He had to keep reassuring these chatters it was on Oven Mode, because of course it was, but yeah.

Ms. Koyano is here at Bic Camera to advise you on whether you should purchase a single-function microwave for just warming up frozen foods and bentos, an oven model that can brown foods like toast and gratins, or a steam oven model that can also clip your dog’s nails.
Second point, professional chefs actually use Chef Mike quite a bit. I’ve been periodically watching some vids here and there on Claire Saffitz’ Youtube channel, and I am hyperaware of whenever she uses her microwave because it’s like a under-the-counter, drawer-style deal. Not calling her out or anything, but given I usually am watching her make some kind of confectionery concoction, she’s usually not Cooking Something in the Microwave. So people who aren’t in the habit of using the microwave for small tasks like this often balk at stuff I wouldn’t even blink at, like using it to soften or melt ingredients.

I don’t think I’ve ever seen a professional baker rise dough in a microwave, tho
But yes, on to the third thing that I’m sure many of you immediately thought of: “Kelp, they don’t usually have full-on stovetop ovens in Japanese households.” And that, is who this cookbook would be useful for. For me, there’s no reason to make the vast majority of these recipes in a microwave, because I have Superior Options. But what if you didn’t? What if you lived in a potentially illegal sublet with something listed as a “kitchenette”? If you only have a microwave, this would open a new realm of possibilities for you.
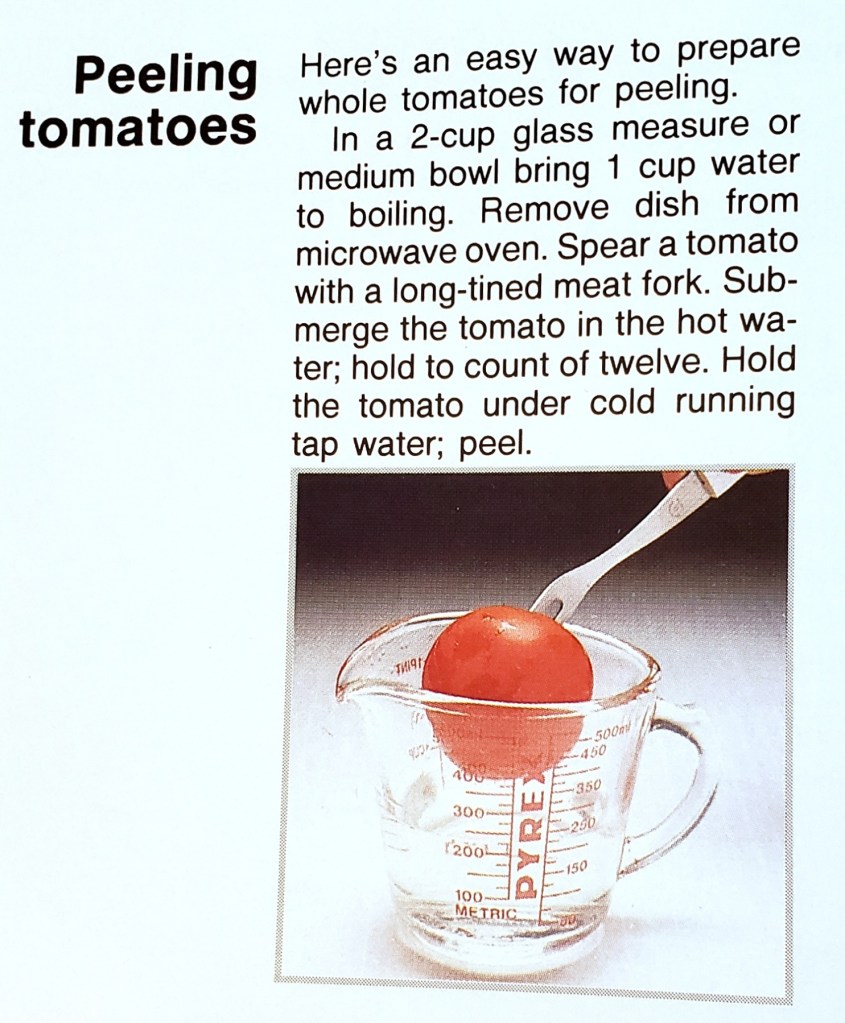
And what’s more exciting than painstakingly peeling tomatoes one at a time!
Did…Did You Make Anything From It?
I did! It took me a while to find a recipe I wanted to test, because many of the ones that sounded appealing taste-wise had a whole heck of a lot of steps. For anyone thinking, ah, Kelp is still dreaming of dump dinners, no, although you know I unabashedly enjoy meat loaves.
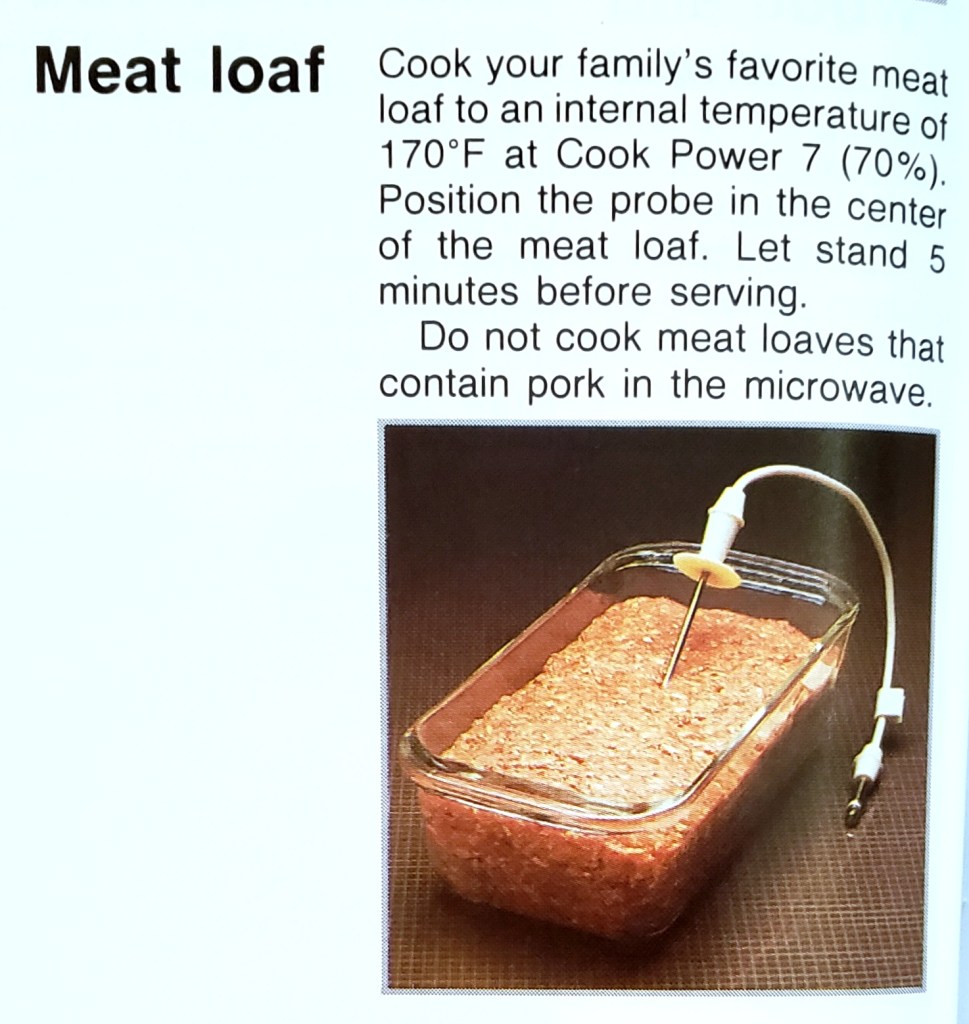
No, I’m not sure what the pork prohibition is about
But yeah, the actual reason I wanted a simple recipe was because of wattage. My current household microwave is actually fairly low wattage for this day and age (1000W), and yet I imagined it’s easily twice whatever these cooking times are based on. Later on, I scoured the cookbook to find literally any specific mention of wattage, and in one (1) paragraph, where they were explaining how Cook Power works, they threw out the number 700. So higher than I thought, but still. Add the fact I’m likely reducing the recipe volume by at least half, and now I’ve got a lot of Microwave Math to do. Choosing something that you cook once, at one power setting, dramatically lessens the margin of error. However, the recipe I did find was…fairly boring.
I imagined it would taste okay, especially since my acid reflux has conditioned me to appreciate Bland Foods, but…I don’t know. Out of ideas, I asked one of my taste testers to take a look through and see if anything piqued her interest. Luckily, there were a few recipes she was interested in, and we settled on…

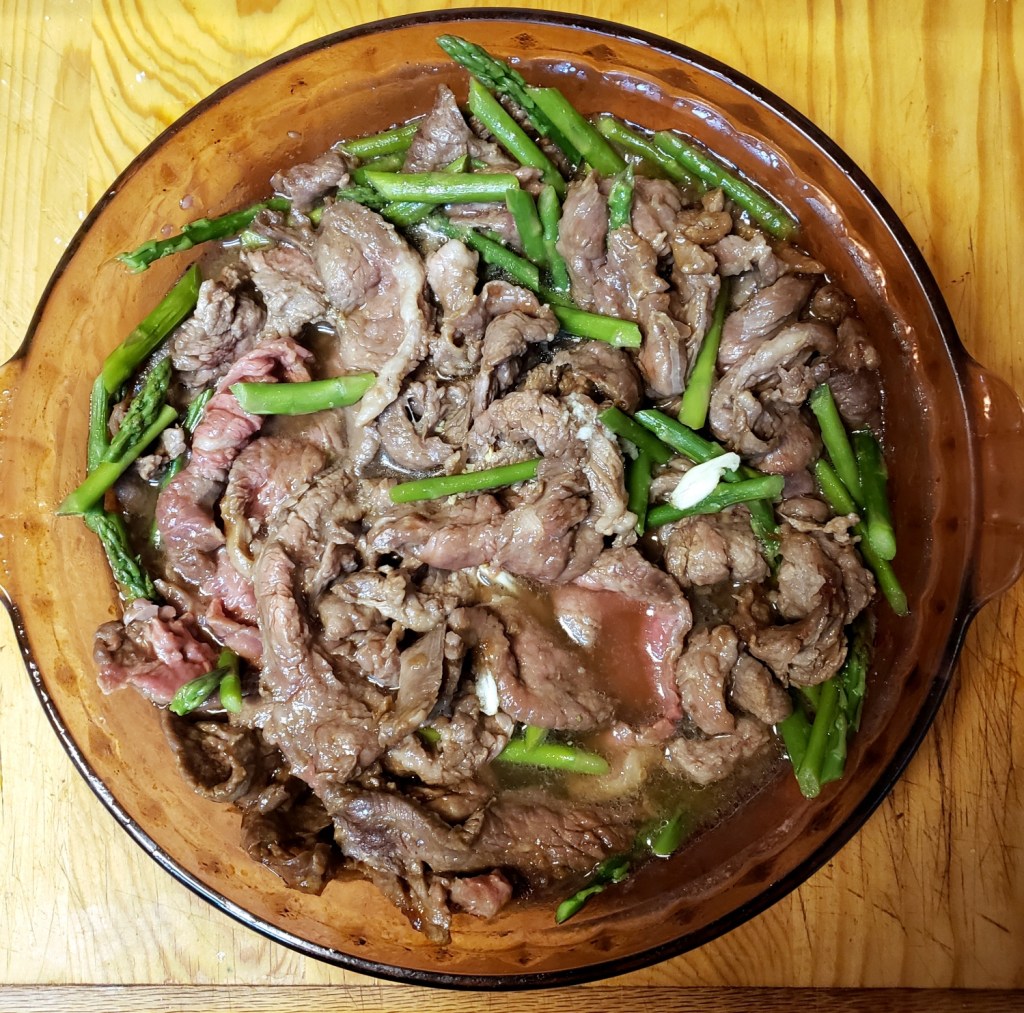
Beef-Asparagus Oriental
My dad’s favorite dish from our slightly local Chinese place is “Asparagus San Yan”, a fairly common looking stir-fry deal with beef, chicken, and shrimp. And asparagus, obviously. This wasn’t that, but close enough that my mom figured it would be worth trying.
The bad news was, hoo boy did it have the exact thing I was hoping to avoid. After quizzing a more experienced cook on estimated times for cooking asparagus, I did the dreaded Microwave Math erring on the side of al dente. I also slightly altered the recipe based on what I had on hand, and after noticing it had not much in the way of seasoning, grated in the last of my on-hand garlic to the marinade/sauce mixture. There was already rice in the rice cooker, so a quick(?) and easy(?) dinner, right?
Yes, It Came Out Okay

I could have cooked it a bit more, for sure, but as I said earlier, better al dente and medium rare than sorry. And even with the added garlic, it was…not bland, but like, one level above bland. My father suggested “heat”, and I would also suggest “ginger”. Maybe toasted sesame seeds, if only for the aesthetic? And/or a dash of sesame oil while you’re at it?? I don’t know, I feel like if you cook any vaguely Asian cuisine you can easily think of what can be added/substituted.
Whirlpool really extols the virtues of round glass dishes for even cooking, so I used a Pyrex pie dish
But also, I would rather just…stir-fry this. And given the amount of prep combined with the constant stopping and stirring, I really don’t think the microwave is any quicker. I guess maybe for the asparagus?? So this recipe proves my point about this being largely about “can you” rather than “should you”. My modified recipe is below, for any microwavin’ Mamorin fans out there.
Kelp’s Beef and Asparagus Bowl
Yield: ~4 servings
Cooked rice (thanks rice cooker!)
1 pound flank steak*
12 fresh asparagus spears
¼ cup water
1 tablespoon cornstarch
2 tablespoons soy sauce
1 tablespoon (sesame) oil
1 teaspoon sugar
2 tablespoons cooking wine**
2 tablespoons broth***
Garlic
Ginger
Heat (of your preference)
*I would buy pre-thinly sliced beef for maximum convenience
**The original recipe used dry white wine, I used cooking sake
***Originally listed as chicken broth, but anything in that ballpark should be fine
All cooking times listed are for my 1000 watt oven, at 100% power. Adjust as needed.
Cut asparagus diagonally into 1-inch pieces, and combine with water in a microwave-safe bowl. Cover and steam for 2 minutes. (Kelp note: you’re essentially parboiling it before cooking it with the meat.) Drain and set aside.
Thinly slice flank steak across grain and place meat in an even layer in a microwave-safe dish. In a small mixing bowl, whisk together cornstarch, soy sauce, oil, sugar, and any additional aromatics and spices. Pour mixture over meat, and cover and cook for approximately 3 minutes. Stir and add asparagus, cooking for another 2 minutes. Stir in wine and broth, and cook until done (roughly another minute or so). Serve over rice.
