
Why Are You Making This?
During Bay Area Kei’s Jelly July, I solicited requests for gelatin desserts on an Instagram story, and a friend of mine volunteered “rainbow ribbon mold”. I decided against it at the time, because it’s a Giant Pain in the Ass. But here we are in a month where there’s rainbow stuff (well, prolly not people’s first guess for ‘rainbow month’, but still). So why not?
This is Why You Should Not Make This
This is normally where I put a “Jump to recipe” button, but not this time. I have to make sure no one needlessly suffers as I did. People typically make this with flavored gelatin mix, even though it’s possible to use specific ingredients or food coloring in combination with plain gelatin to make any color of dessert you want. (Well, maybe not any color. But quite a few.) If you ask people how many colors are in a rainbow, they’ll prolly answer seven. Roy G. Biv and 七色 and all that. But listing out those seven gives us the following:
- Red
- Orange
- Yellow
- Green
- Blue
- …Indigo?
- Violet, aka Purple
As much as I would love there to be readily available denim-colored gelatin mix (you’ve heard of Jell-o🄬, get ready for…oh. I guess the j- prefix is already there), there isn’t. As for Purple, there is grape flavor Jello, but it’s nasty. (No offense if you like it, but I’ve yet to meet anyone who does.)
Luckily for me, rainbow ribbon molds tend to stick to the first five colors in that list. Part of that is because each color requires 2 layers, making a 5-color rainbow ribbon a TEN LAYER MOLD. It took me about four hours to make this from start to finish, and while there was some downtime, I had to spoon on another layer about every fifteen minutes. Enough time for me to get a lot done on my one mobile game I play, but not enough time to leisurely watch an episode of Cat’s Eye.
♬ 怪しく CAT’S EYE…MAGIC PLAY IS DANCING ♬
It Gets Worse
There are lots of recipes available online for a rainbow ribbon mold, but I decided to use the one in my Jell-O Classic Recipes book, and That Was A Mistake.
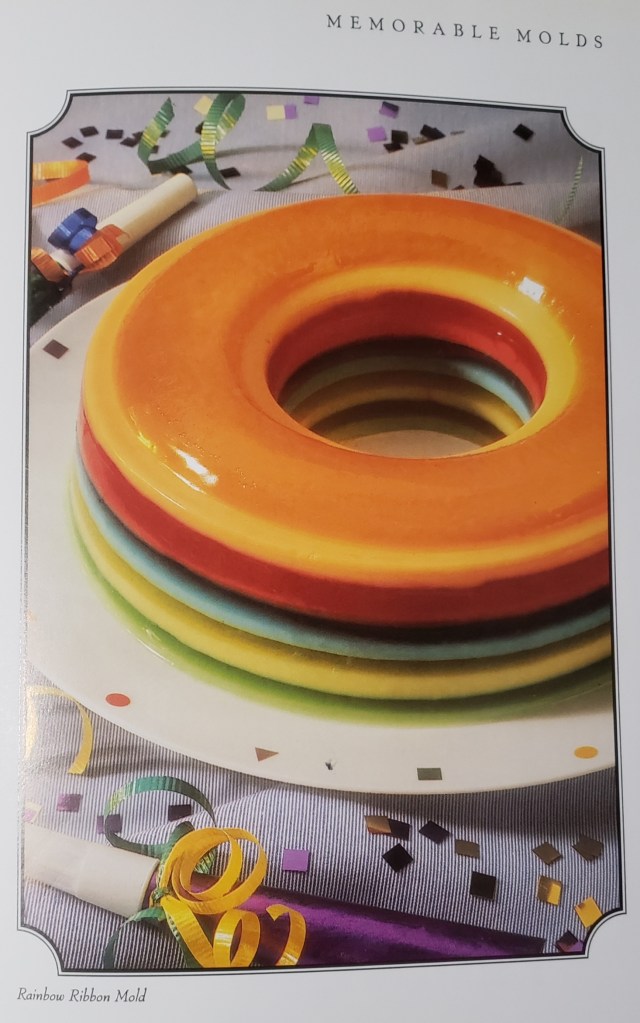
I should have known whoever made this “rainbow” couldn’t be trusted
You see, the very first thing I did was check to see what type of mold I needed. The recipe states quite clearly “6-cup ring mold”, and luckily I happened to have that exact size and shape in my Box o’ Molds. But by the time I got three colors poured, I began to suspect my mold might overfloweth. Double-checking the recipe, the first thing I see is 6 ¼ cups boiling water.
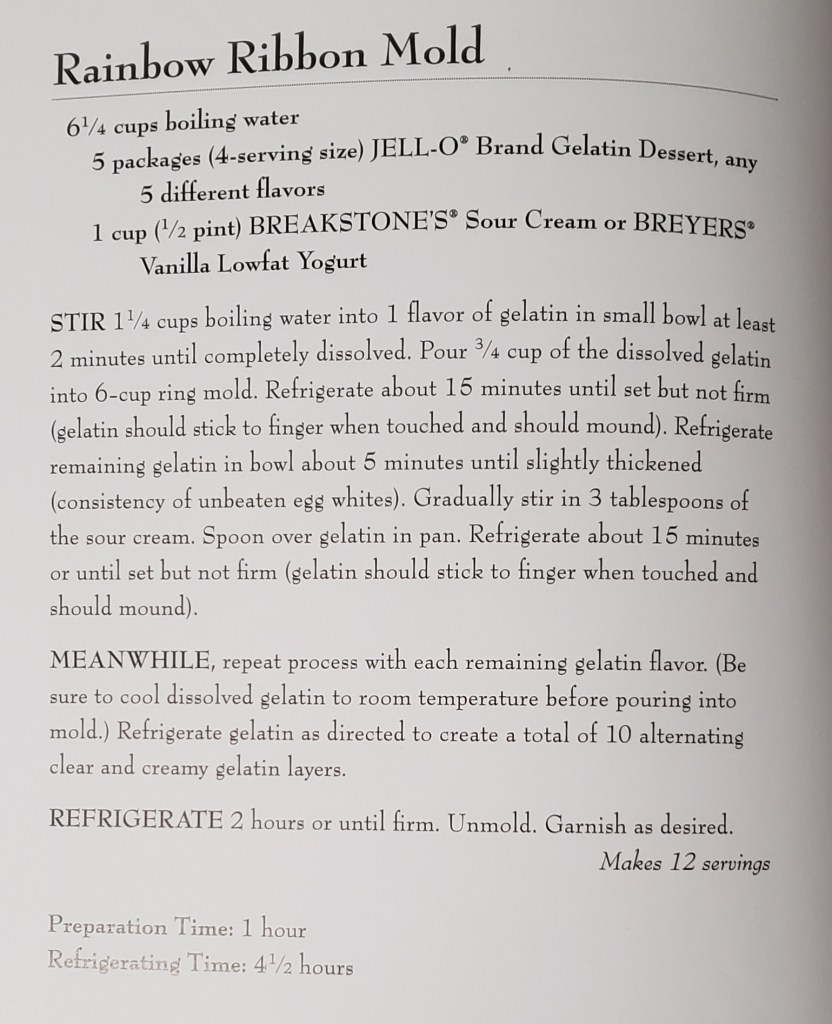
The original recipe, which you definitely shouldn’t use
Wait, what? 6 and a quarter? And there’s also a cup of yogurt! (Actually technically 15 tablespoons, but that’s another story.) In the end, I could only fit 4 colors (i.e., 8 layers) in my 6-cup ring mold.
Yep, she’s full
Well, some determined person I made up just now says, why not just use a larger mold? Well, I don’t have an 8-cup ring mold, and while a ring mold isn’t strictly required, you do want something with relatively straight sides to ensure even layering.
The other possibility is to modify the recipe to fit a 6-cup ring mold, but that’s even less easily done. As written, it conveniently uses a single 3-oz package of each flavor. And if I simply cut the recipe in half, the layers would end up way too thin for a 6-cup mold. The math adds up – making a rainbow ribbon mold officially sucks.
Other Tedious Decisions I Had to Make
Alright, so despite all this you have still decided to embark upon a rainbow ribbon road to hell. Let’s cover what else needs to be readied. First off, recipes pretty consistently recommend using either sour cream or vanilla yogurt. For my attempt, I went with plain greek yogurt, because that’s what I could find at the store. Be advised that using a sweetened yogurt will add sugar to already sweetened gelatin mix.
Next up is the colors. If using Jell-o brand mix, Blue and Green only have one possibility: Berry Blue and Lime, respectively. As I’ve mentioned in previous gelatin blogs, Berry Blue only really exists to be The Blue Flavor. There’s a picture of a strawberry and a couple blueberries on the box, but it just tastes of blue. Think cotton candy, or Japanese ‘soda’ flavor.
Yellow and Orange technically have two choices. For Yellow, you could use Island Pineapple instead of Lemon. Please don’t. Island Pineapple not only tastes off, but also smells off. Something went wrong in the food science lab that day. The obvious choice for Orange is well, Orange, but you could go with Peach. It’s not the same shade, but it is orange-ish.
Last we have Red. I wanted to go with Cherry, but I only had Strawberry and Cranberry on hand. Cherry, Raspberry, and Cranberry are all approximately the same shade of cool red, while Strawberry is a warmer orange-toned red. But it’s fine. That turned out to be the least of my worries.
Other Mishaps
The recipe claims your first layer will set up in fifteen minutes, but it won’t. I waited about twice that to spoon on my second later and still borked it, but consoled myself with the fact that at least I could show blog readers what that looks like. While carefully spooning in subsequent layers, I realized my plan of mixing all layers ahead of time was also going to be a problem, as each layer took so long, and my kitchen was so cold, that the last few colors started to set up on my counter. (This is an easy fix, however – you can remelt gelatin in the microwave without negative consequences.) And then there was the whole “actually only 4 colors are gonna fit in a 6-cup mold” deal. Did I mention this took about 4 hours of layering?
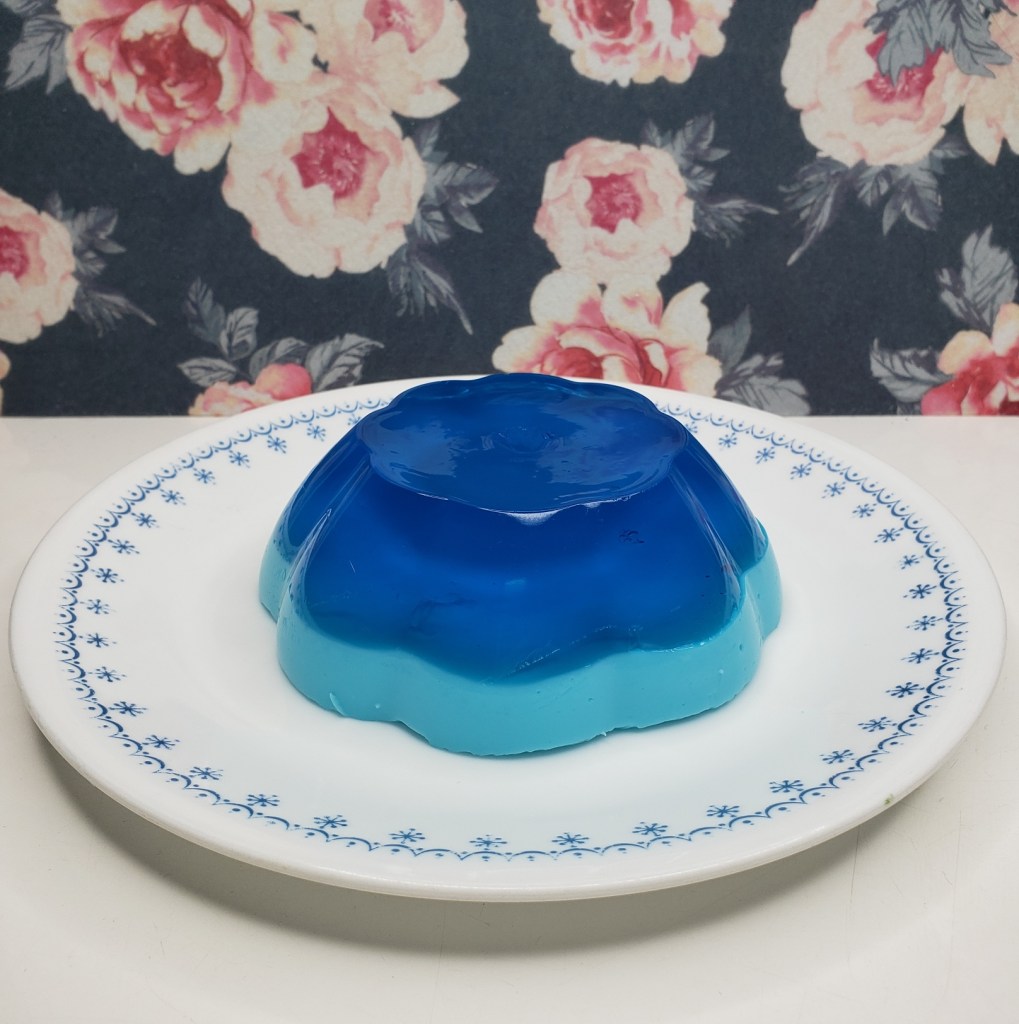
My blue leftovers
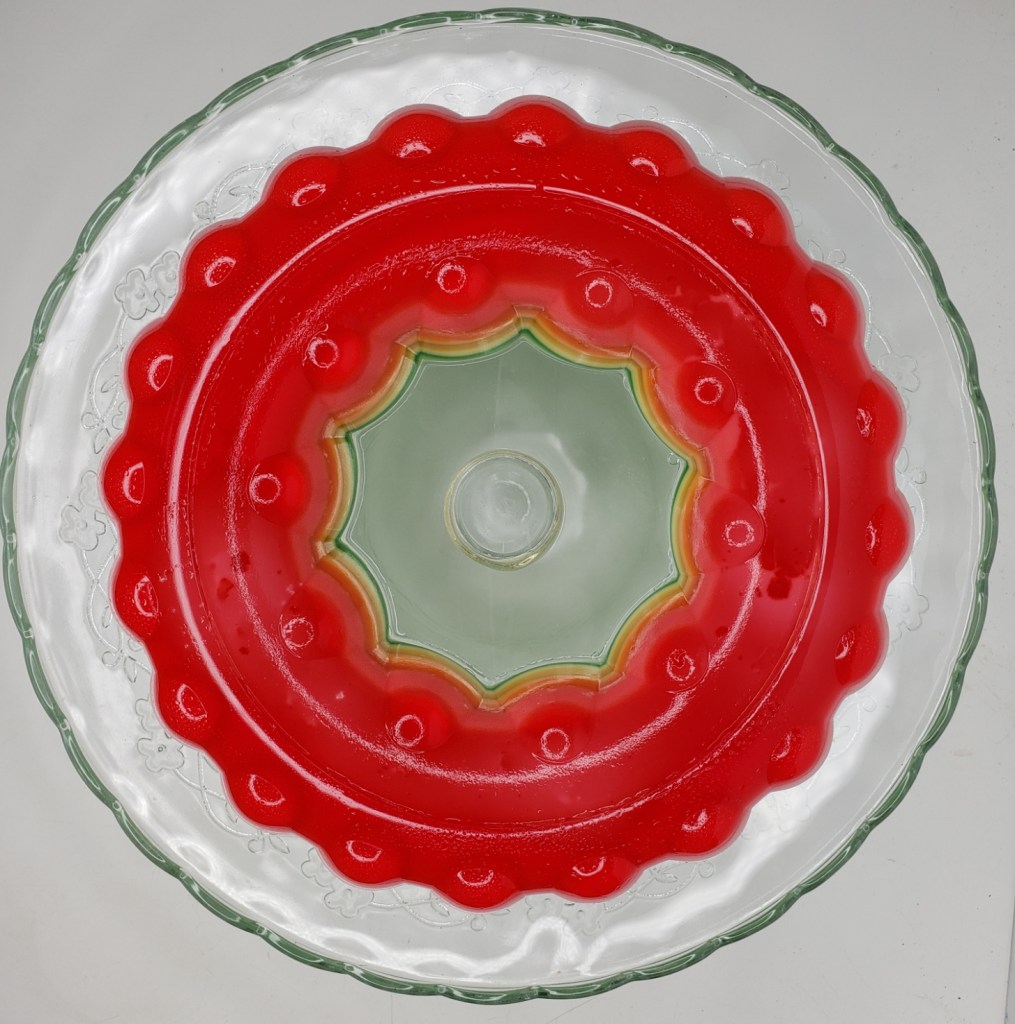
Luckily, the unmolding process was fairly uneventful. I did make sure to grease the mold ahead of time, and this particular ring mold has a detachable center, which you can use to easily get a nice air pocket going.
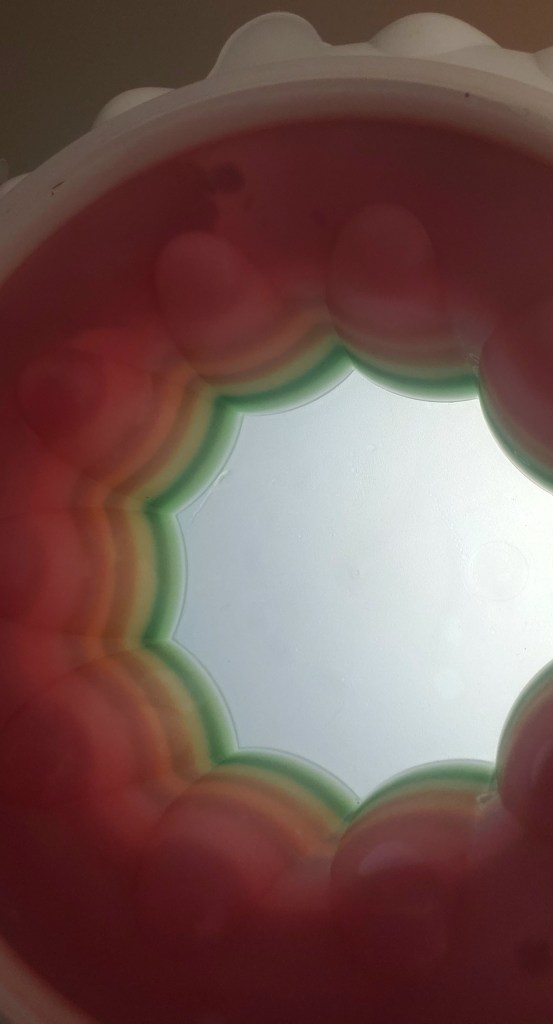
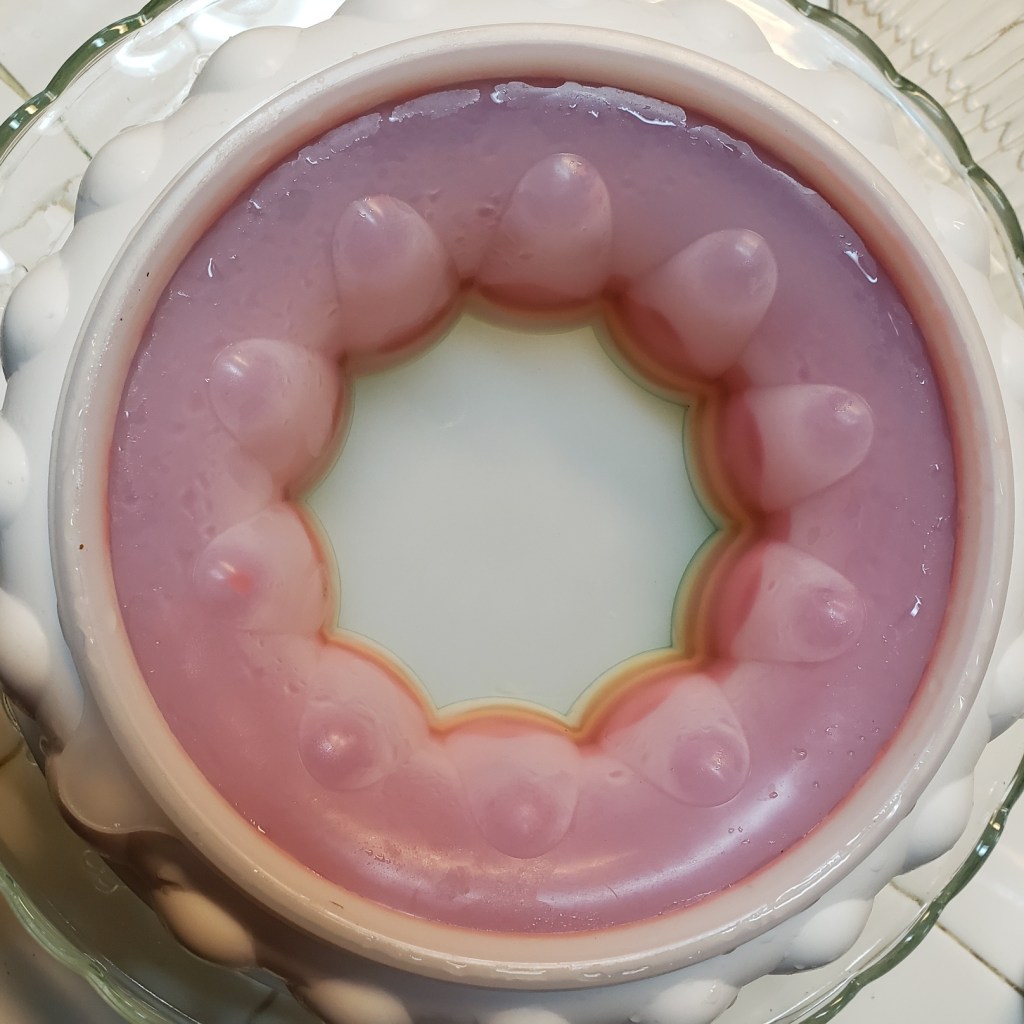
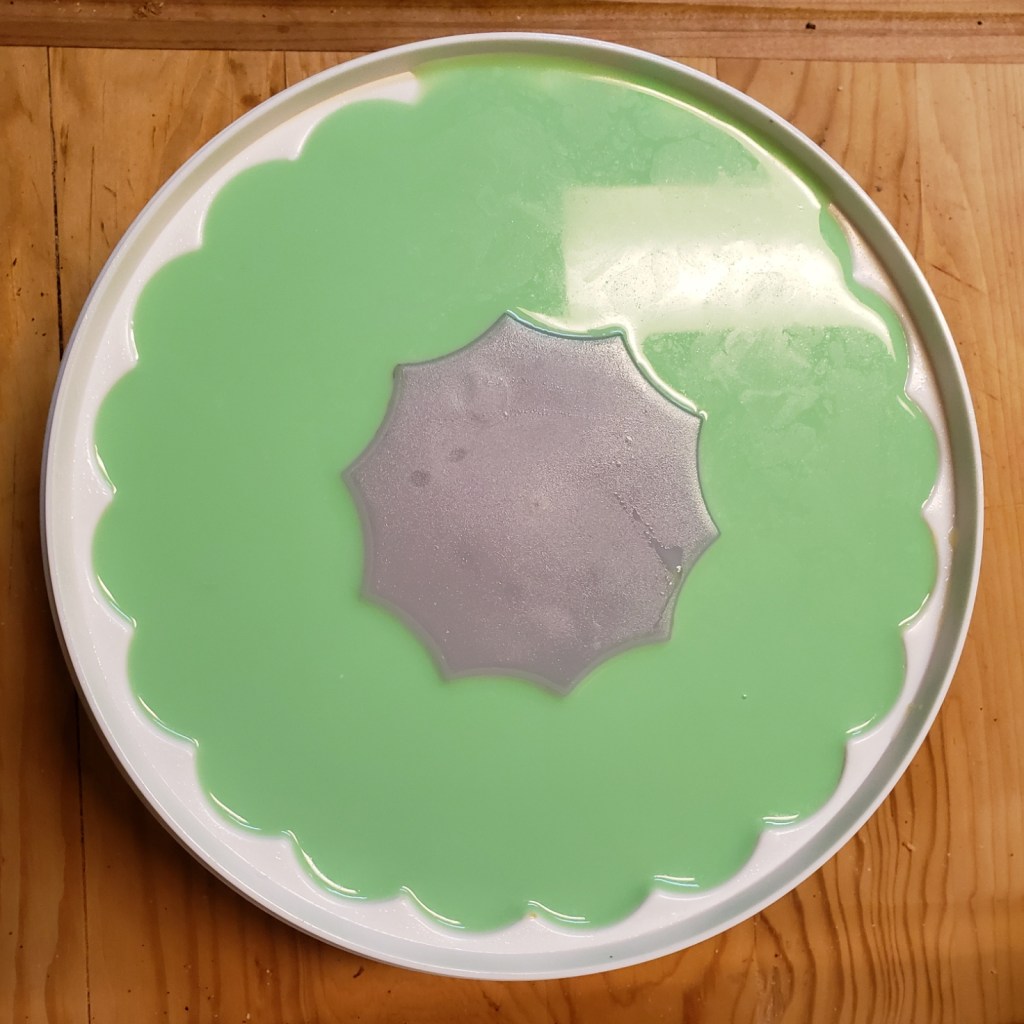
Left: Clear middle allows for a hazy preview. Right: lifting the tab on bottom left introduces air to loosen gelatin from sides
So, how did it come out? Shockingly okay! There’s definitely some wonkiness in layer thickness, as well as something I’ll called ‘specklage’ that I’m not really sure how to prevent. But I’m sure it would handily impress anyone at a party, even with only the four colors. Also, as you can see below, there doesn’t end up being a whole lot of contrast between the orange and yellow layers. If I ever made this again, I would want due compensation. But also, I would go Red, Orange, Green, Blue for my four colors.
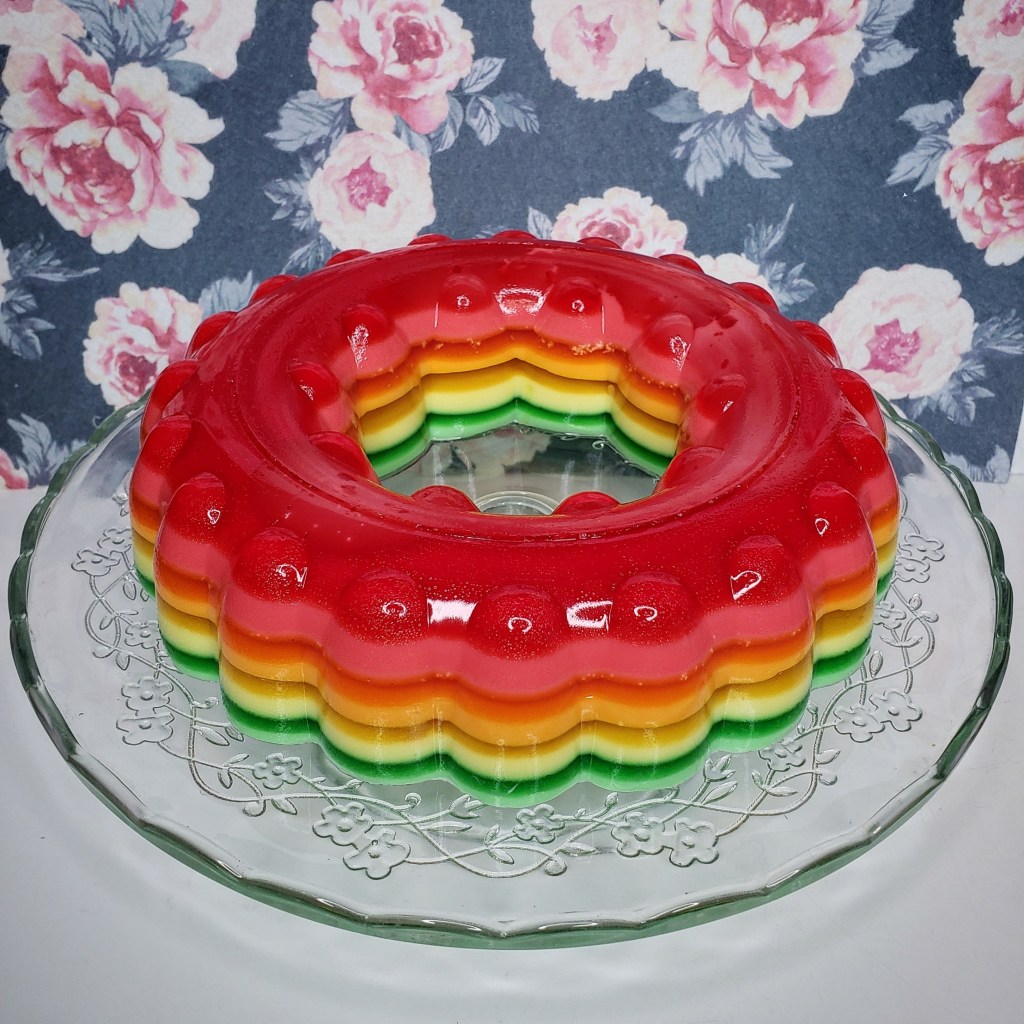
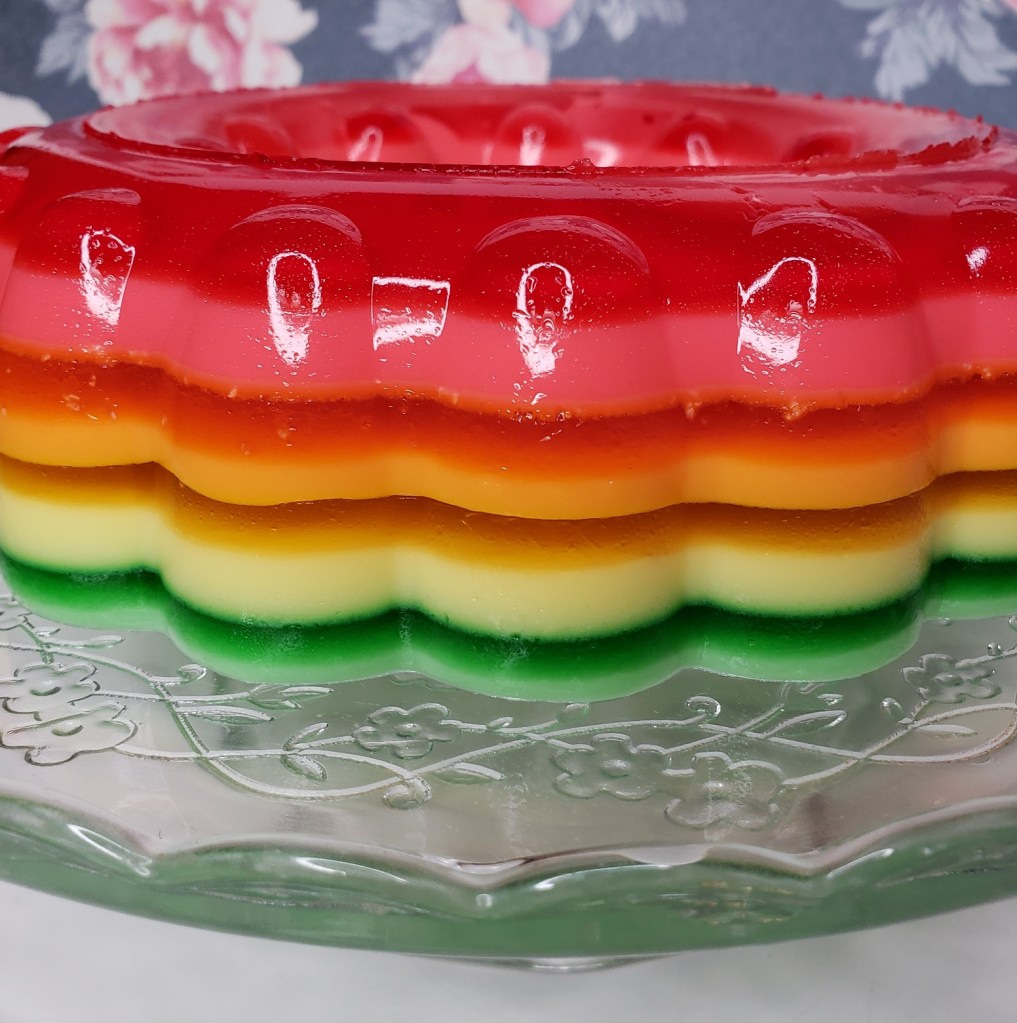
Left: An overhead view of my slightly borked first layer. Right: The cleanest side view.
Note that due to this mold’s shape, the first few layers will necessarily be thicker than the last ones, but also there’s some wonkiness that is likely attributed to my imprecise yogurt measuring. Again, if you bring this to a party and anyone isn’t impressed, shun them.
Recipe
- 6 ¼ cups boiling water
- 5 3-oz packages of flavored gelatin mix, any 5 different flavors*
- 1 cup yogurt or sour cream
*As mentioned above, I recommend Cherry, Orange, Lemon, Lime, and Berry Blue. But you do you!
First, make sure you have a mold big enough for this recipe. As written, you will have approximately 7 ¼ cups of rainbow, and you’ll want at least another ¼ cup of breathing room. You can easily measure a potential mold ahead of time by filling it with water, and then measuring out that water. Also know that if you end up using a mold that flares out from the base (as opposed to one with relatively straight sides), your layers will vary a lot in thickness. If, like me, you only have a 6-cup ring mold, you can use this recipe to make a 4-color version. You’ll need slightly less yogurt, but I trust you’ll find another use for it.
Onto the layers. The original recipe has you make each flavor one at a time, and I have to sadly admit that might be the way to go. You have a lot of downtime between layer pours anyways. Start with the flavor you want on top. Pour 1 ¼ cup boiling water into a bowl with a 3-oz package of flavored gelatin and stir until fully dissolved (about 2 minutes). Pour ¾ cup of dissolved gelatin into the ring mold and refrigerate. In the meantime, add 3 tablespoons of yogurt to remaining gelatin and thoroughly combine. (Kelp tip: You might want to wait until the gelatin cools a bit before combining with yogurt for best results. You got time.) Once initial gelatin layer is set, but not firm, gently and slowly spoon cooled yogurt mixture over top and stick back in the fridge to set.
Extended Kelp tip: “Set, but not firm” for me is “you can touch it and it’s still very soft and sticky”. The only danger of waiting too long to layer is risking your layers not strongly adhering, but I would say it’s prolly gonna take about a half hour to 45 minutes for that first layer of piping hot gelatin to set. While I’m here, I would recommend you use the downtime from waiting for the first layer to set to go ahead and make the next color for layer 3 and 4. You can’t pour a layer unless it’s cooled anyways.
Continue process, alternating cooled plain gelatin and cooled yogurt gelatin layers. After you finish your last layer, return to fridge to fully set. (Kelp tip: I’d say at least 2 hours, but honestly I’d go 4~5. The longer the set, the more the gelatin will shrink and pull away from the mold, making it easier to unmold.) Unmold and garnish with your tears of despair at the meaninglessness of existence.
